10 DIY Chicken Coop Ideas Anyone Can Build (With Plans and Real Costs)
Building your own chicken coop is deeply satisfying, saves money compared to buying pre-made kits, and gives you complete control over size, layout, and features. These 10 DIY chicken coop ideas range from a single-weekend pallet build to a full-week custom coop project — with honest cost estimates and the key tools you need for each.
Start with your flock size in mind. Overcrowded coops cause stress, disease, and pecking problems. Build slightly larger than you think you need — you will almost certainly want more chickens later.
What You Need Before You Start Building
Essential Tools
- Circular saw or hand saw for lumber cutting
- Drill and drill bits
- Heavy-duty staple gun for hardware cloth attachment — see our Heavy Duty Staple Gun Review
- Galvanized poultry staples — our top pick here
- Level, measuring tape, and pencil
- Safety glasses and gloves
Essential Materials
- Pressure-treated 2×4 lumber for the frame
- Galvanized hardware cloth — half-inch mesh for all openings
- Poultry netting — for run fencing
- Corrugated metal or asphalt shingles for the roof
- Wood screws and joist hangers
10 DIY Chicken Coop Ideas and Plans
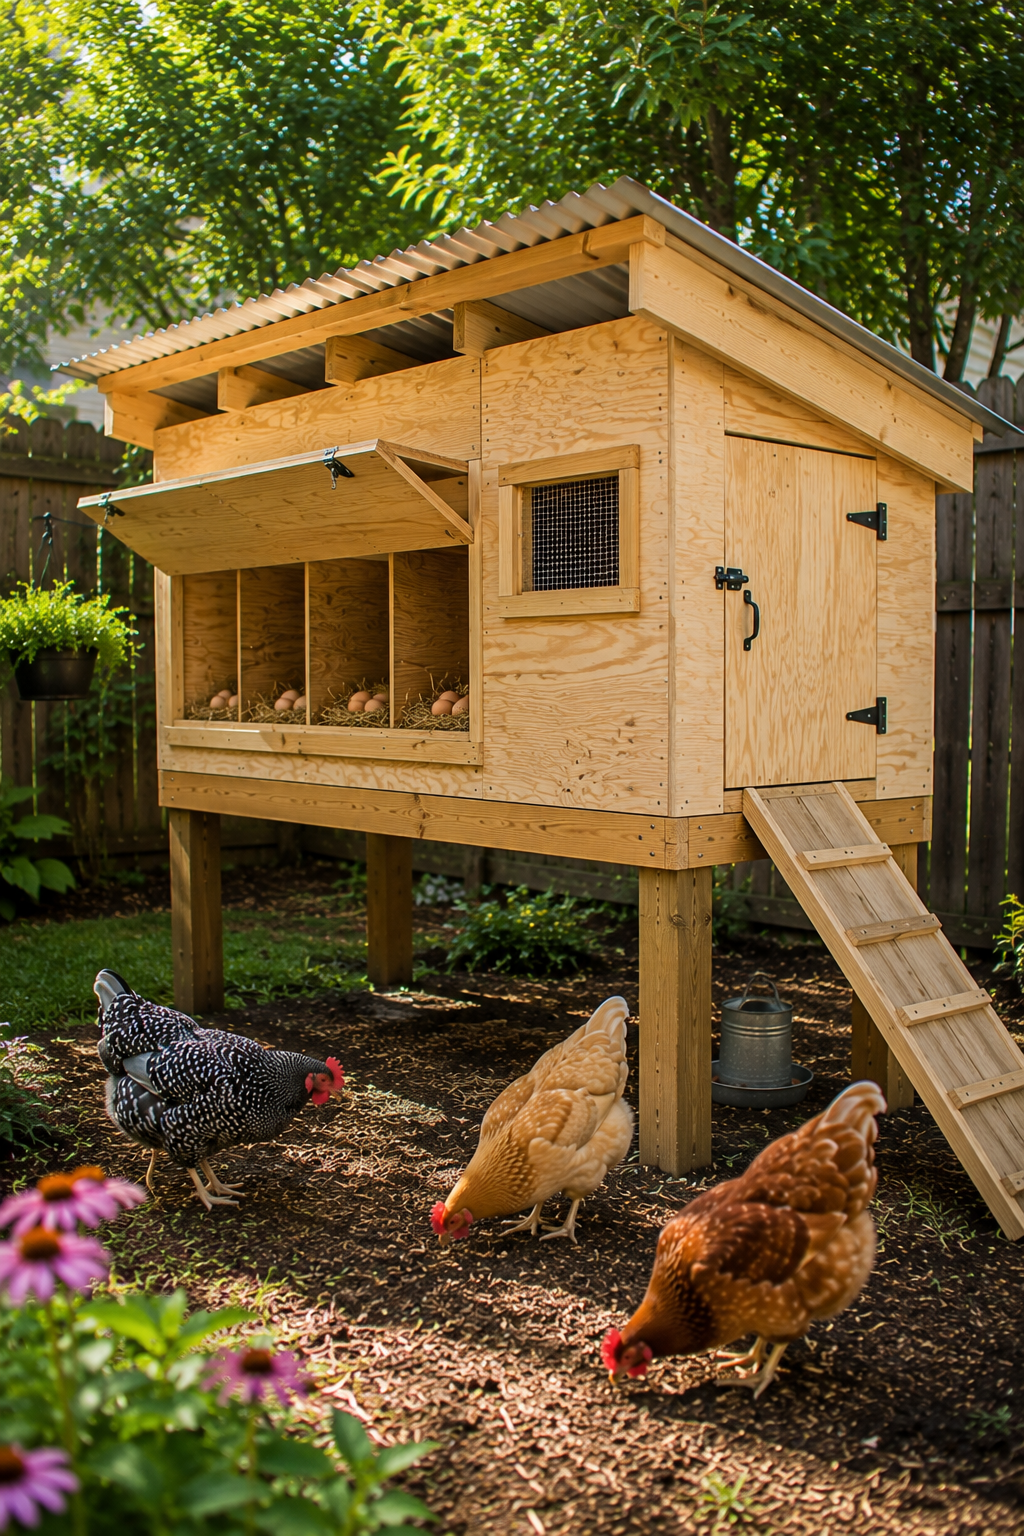
01/ The Basic Box Coop ($150 to $250)

A simple 4×6 foot box coop on legs. Four walls of plywood, a pitched roof covered with metal roofing, a single window of hardware cloth on each side wall, and two nesting boxes inside. A hinged roof section makes cleaning easy. Perfect first coop build for a flock of 4 to 6 hens.
02/ The Pallet Coop ($50 to $100)
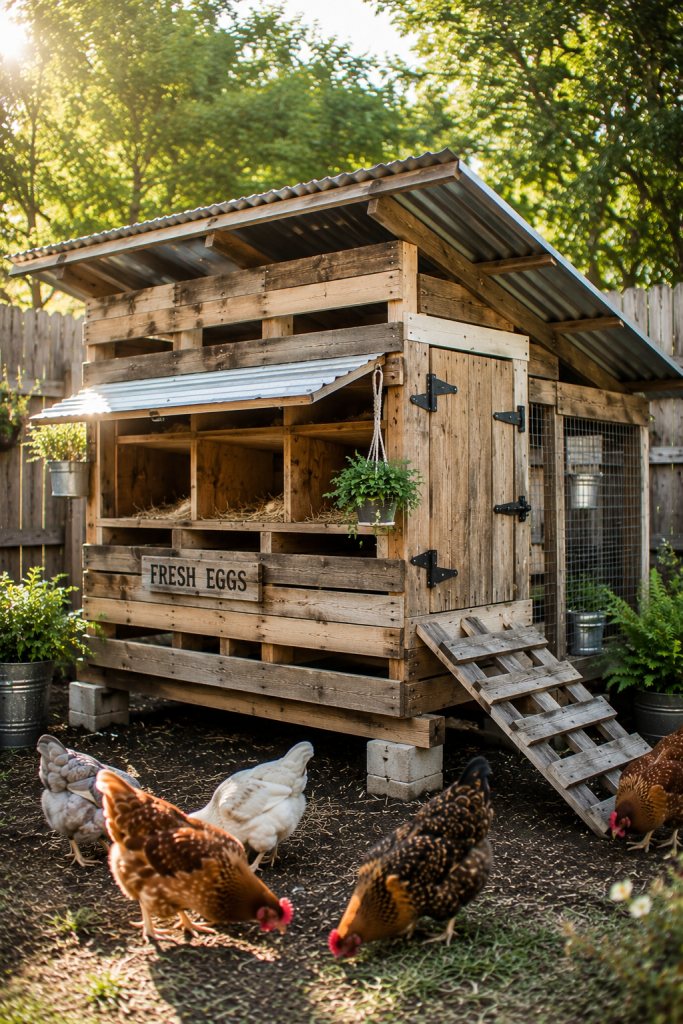
Collect 6 to 8 standard shipping pallets. Stand two on each side, one at the back, and one for the door frame. Cover gaps with hardware cloth, add a corrugated metal roof, and line the inside with weatherproof ply. This is the most affordable DIY coop option available.
03/ The A-Frame Portable Coop ($100 to $200)
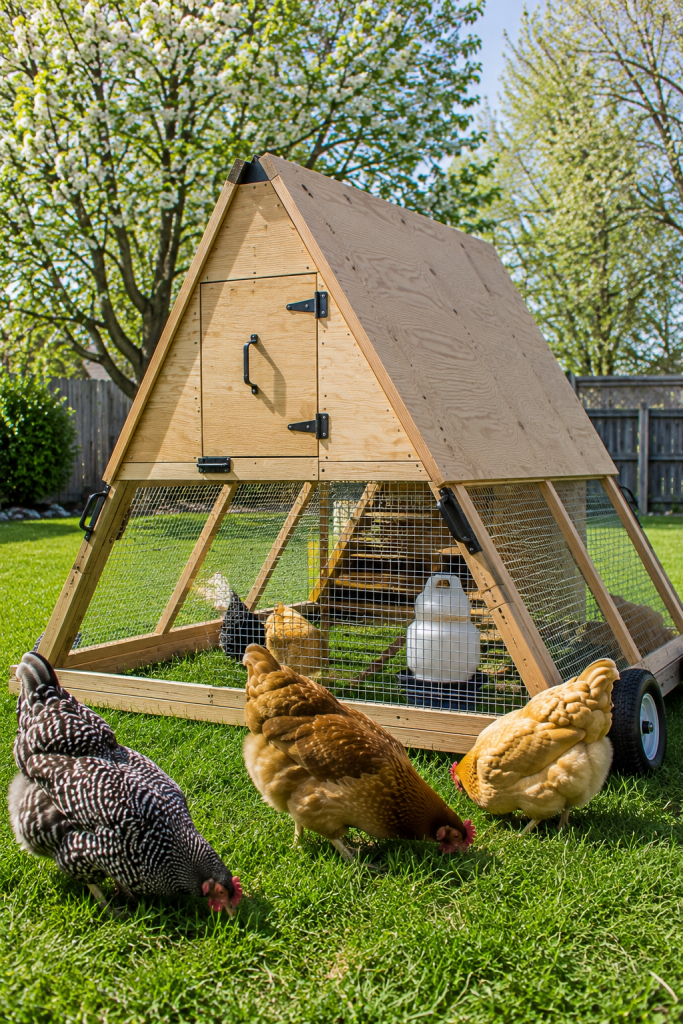
Two large A-shaped frames connected with horizontal rails create this lightweight, movable coop. Cover with plywood and corrugated roofing on the top half, hardware cloth on the lower half for ventilation. Add wheels to one end for easy moving across the lawn.
04/ The Garden Shed Conversion ($100 to $300)
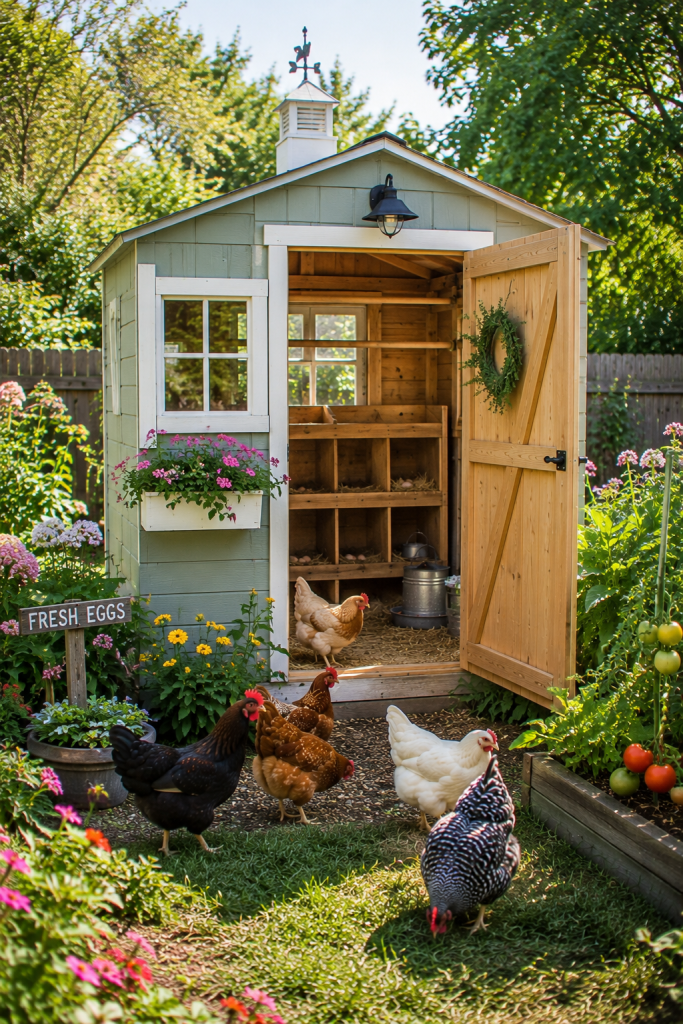
Purchase or repurpose an 8×6 foot garden shed. Remove any toxic shelving, add three nesting boxes along one wall, install roosting bars 18 to 24 inches apart at shoulder height, add hardware cloth ventilation panels near the roofline, and cut a small pop door at ground level.
05/ The Hoop Coop ($80 to $150)
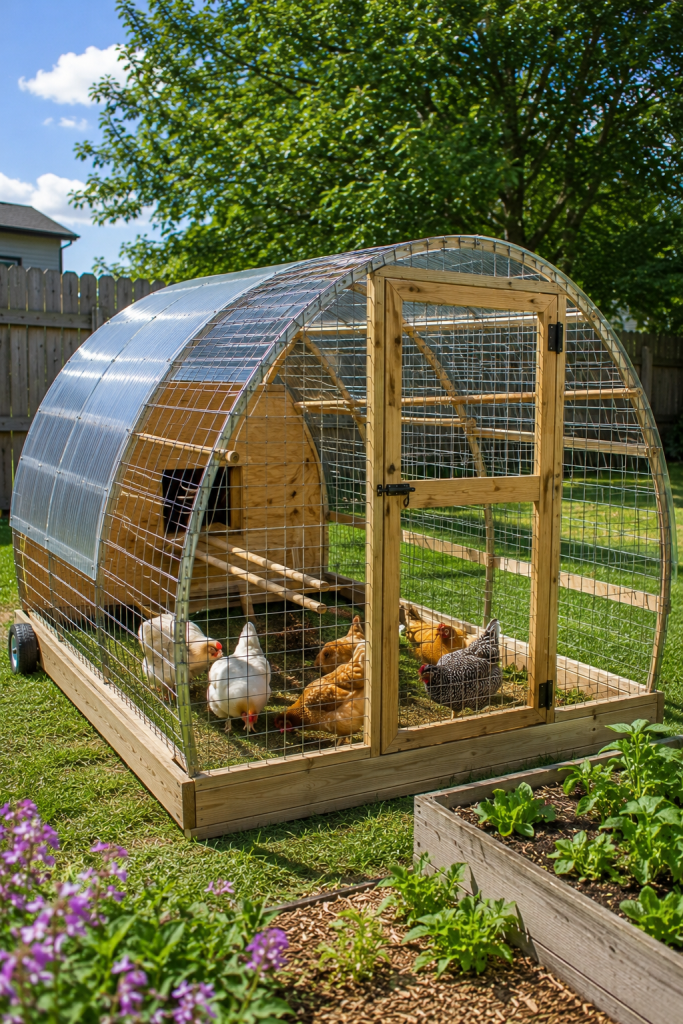
Bend cattle panels or flexible conduit into a series of arches over a rectangular base frame. Cover with chicken wire or hardware cloth for the walls and corrugated polycarbonate for the roof section. Very quick to build and naturally ventilated.
06/ The Lean-To Against a Fence ($120 to $220)
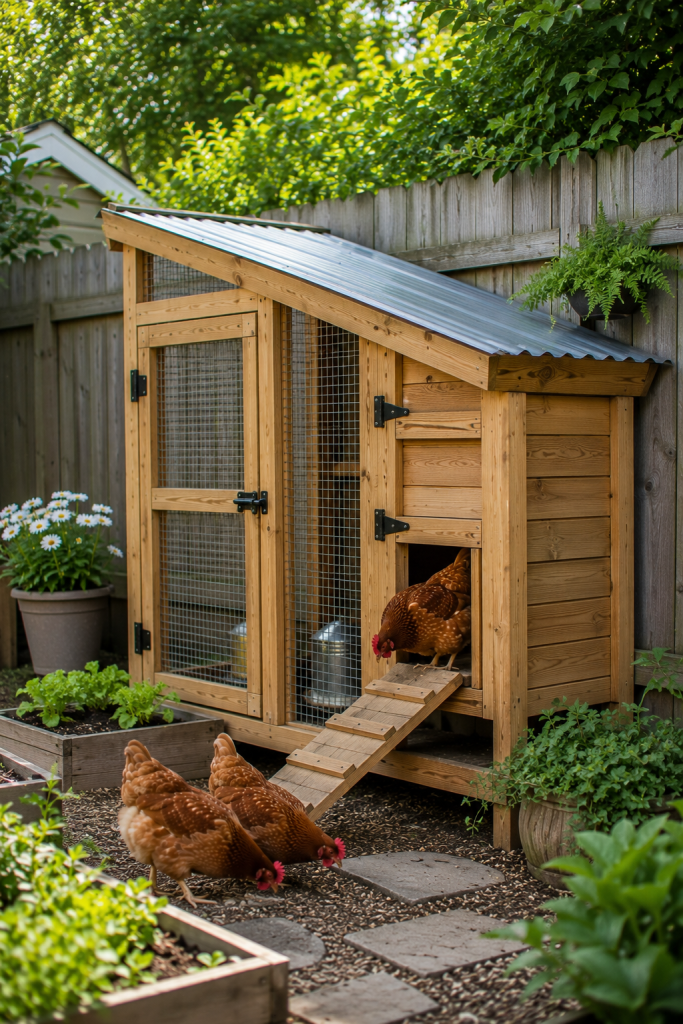
Build a simple lean-to structure against an existing solid fence. The fence forms the back wall, saving significant material cost. Frame three additional walls from lumber, cover with hardware cloth, add a simple sloped roof, and attach a small coop box at one end for sleeping.
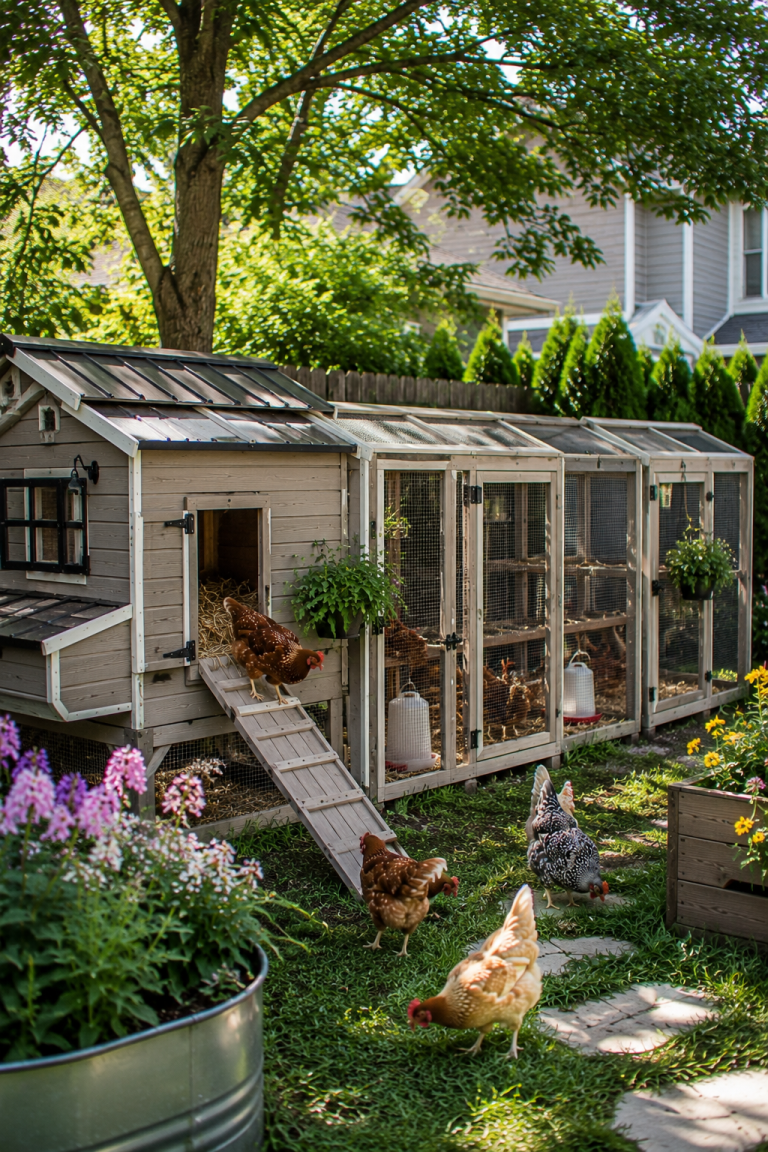
07/ The Two-Story Coop ($250 to $450)
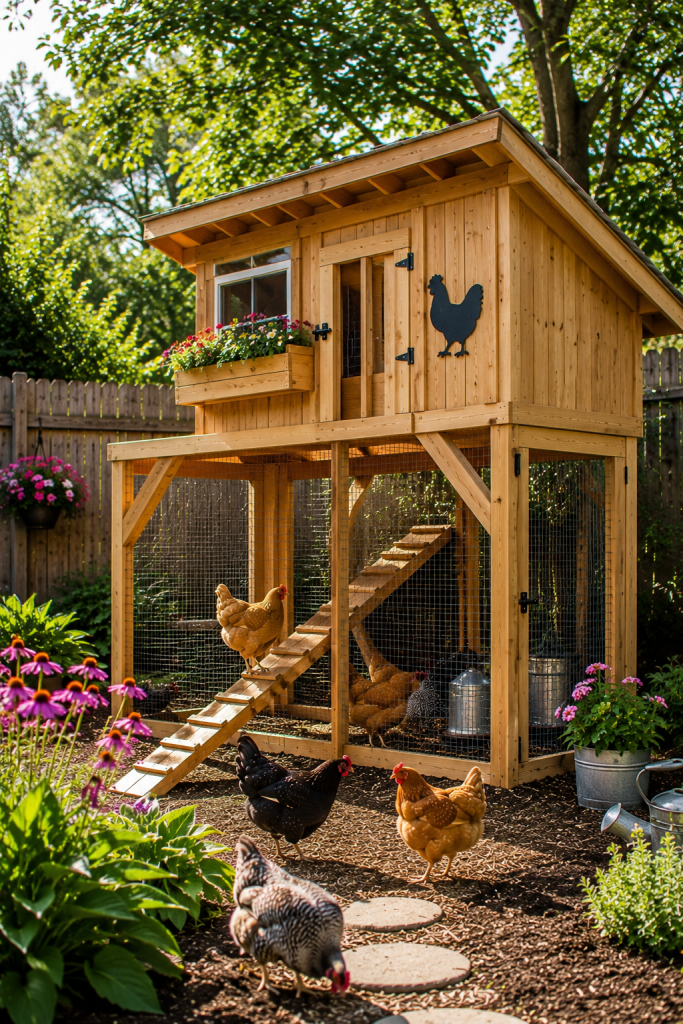
A raised sleeping area accessed by a ramp above a sheltered run area below. Hens sleep and lay in the upper section, sheltered outdoor space below for rainy days. Efficient use of a small footprint with maximum living area for the flock.
08/ The Converted Dog Kennel ($150 to $300)
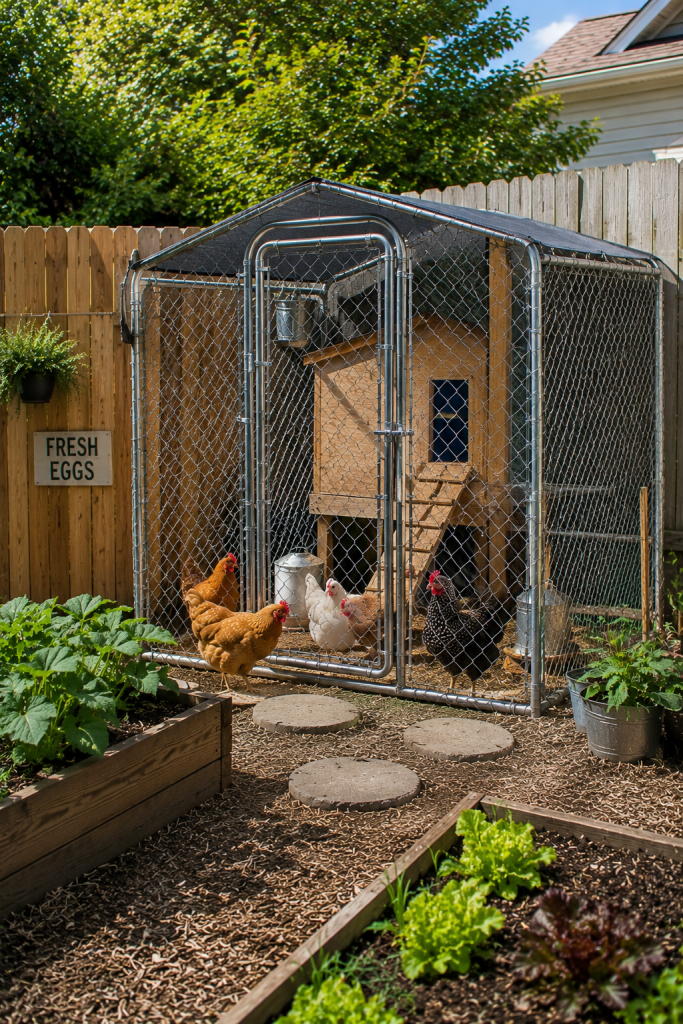
A standard chain-link dog kennel converts into an excellent chicken run in an afternoon. Cover the floor with sand or deep litter, add a simple plywood shelter box inside for sleeping and laying, and cover the top with hardware cloth or a tarp to prevent aerial predator access.
09/ The Greenhouse Coop ($200 to $400)
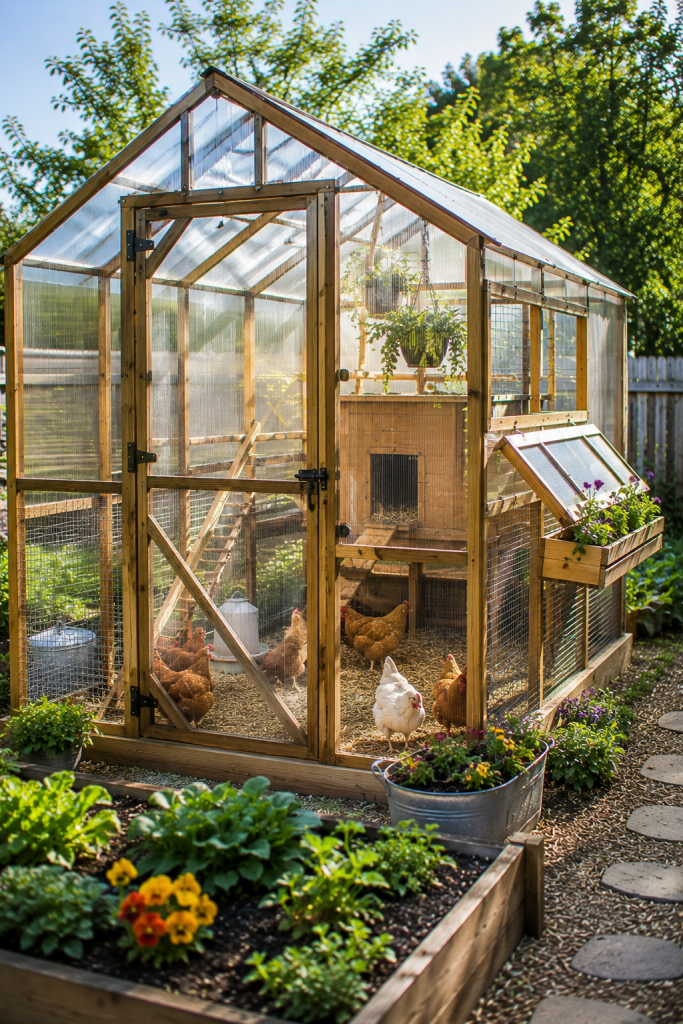
Use greenhouse polycarbonate panels for the walls to create a bright, warm coop. The transparency floods the interior with natural light year-round, supporting egg production through winter short days. Build a wooden frame and clip the panels into place.
10/ The Premium DIY Walk-In ($400 to $800)
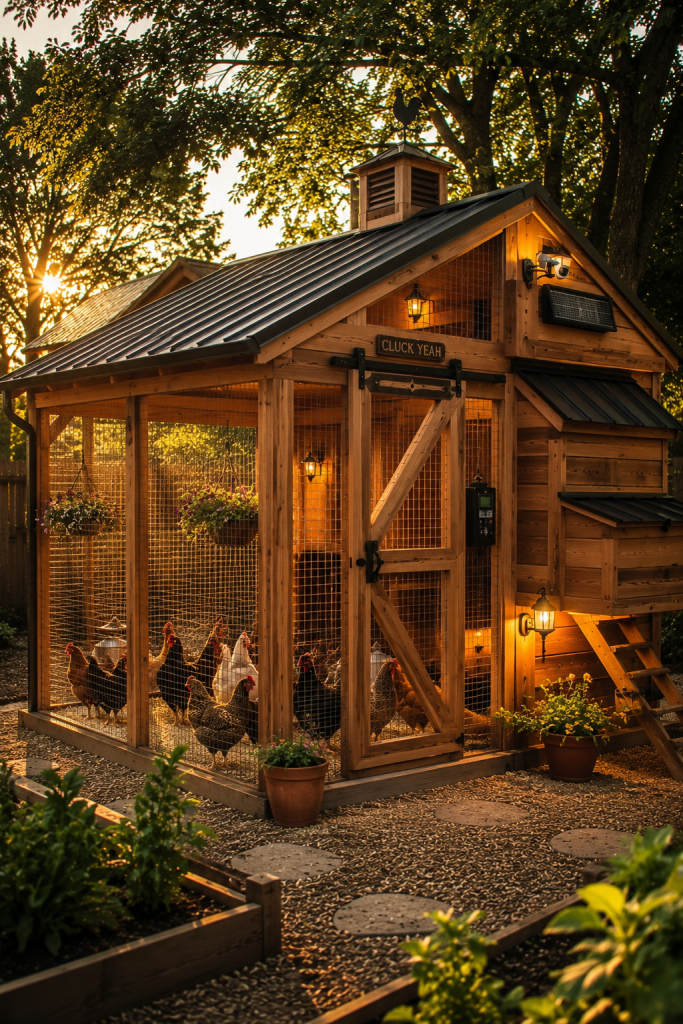
A full walk-in coop built to last decades. Framed from 4×4 posts and 2×4 rails, clad in cedar or T1-11 siding, metal roof, proper ventilation near the roofline, and every opening secured with hardware cloth. Add an automatic door, solar light, and security camera for the complete setup.
More Ideas: 15 Backyard Chicken Coop Ideas You Can Build This Weekend
Critical Predator-Proofing Checklist for Any DIY Coop:
- Hardware cloth on all openings — not chicken wire. Use half-inch welded mesh
- Predator-proof latch on every door — two-step mechanism to defeat raccoons
- Bury hardware cloth 12 inches underground in an L-shape to prevent digging
- No gaps larger than half an inch anywhere in the structure
- Install an automatic coop door to eliminate the most common vulnerability — forgetting to close the door at dusk
Frequently Asked Questions:
How long does it take to build a DIY chicken coop?
A simple pallet or basic box coop takes one to two weekends. A full walk-in coop with proper finishing takes 3 to 5 weekends. Plan extra time — it always takes longer than expected on first builds.
What wood should I use for a chicken coop?
Use pressure-treated lumber for any ground-contact framing. For walls and interior surfaces, regular pine or fir is fine. Cedar is naturally rot-resistant and aromatic, making it excellent for nesting boxes and interior cladding.
How do I ventilate a DIY chicken coop?
Install ventilation openings near the roofline on all four walls, covered with hardware cloth. Total ventilation area should be at least 1 square foot per 10 square feet of coop floor area. Ventilation prevents moisture buildup, which is the primary cause of respiratory illness in backyard chickens.